Develop Skills with:
Getting Started
|

LEARNING TARGETS:
- I can cut and pierce sheet metal to create jewelry pieces
- I can file and sand metal to a high quality finish
- I can use the elements and principles of design to create a well planned jewelry piece
- I can manipulate wire to create identical link pieces and clasps.
Tools and Supplies
Click the images below to learn more!
|
|
Cutting
Demonstrate your cutting ability by cutting two geometric shapes on balsa wood. Helpful Tips
|
|
|
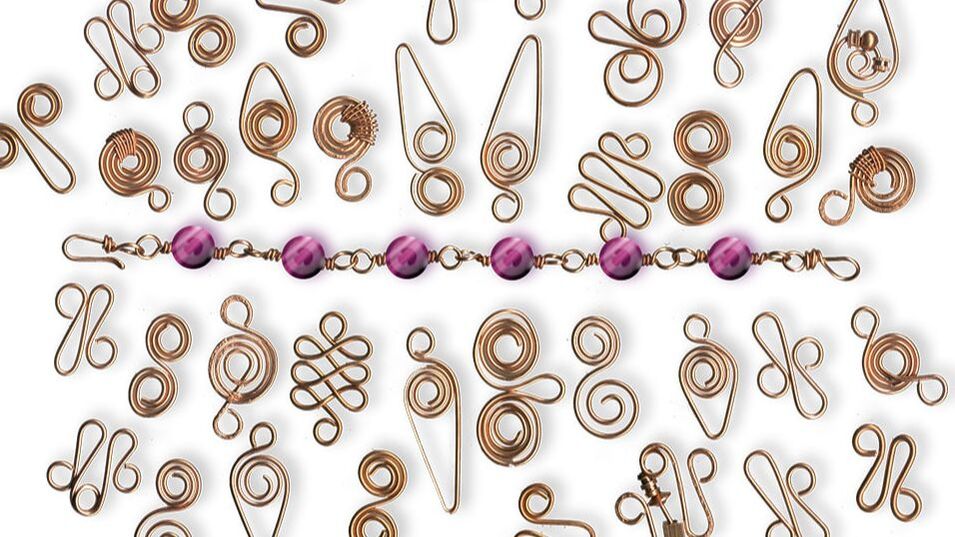
Wire Manipulation
Wire Wrapped Loop Wire Wrapped Connector Wire Spiral |
Examples and Links
Experiment
Experiment with Wire Manipulation
Activity 1: Activity 2: Activity 3: |
Experiment with Cutting and Finishing a Shape
Activity 1: Activity 2. Activity 3. |
Practice
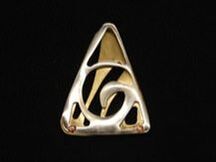
Activity 2: Pierced Necklace
Piercing is a technique that allows you to cut negative space out of a piece of metal
For this practice you will be creating a necklace made of wire links or jump rings and cut and pierced sheet metal pieces. Your necklace should
Piercing is a technique that allows you to cut negative space out of a piece of metal
For this practice you will be creating a necklace made of wire links or jump rings and cut and pierced sheet metal pieces. Your necklace should
- Include 5 cut out shapes making up the necklace and include a pierced design in at least 3 of them. If you are attempting a very complex design, this could be less. See me if you think this is you.
- Use at least 3 types of jump rings or other creative wire designs to connect the pieces together.
- Include a clasp
- Be filed and sanded to a high quality polished finish
Essential Questions: How is my necklace going to look? How am I going to build it?
1 ) Use a piece of yarn or string to experiment with different lengths for your necklace.
2) Trace your string lightly on a piece of drawing paper.
3) Sketch where you sheet metal pieces and links will go. They should be sketched in actual size. Remember you need 5 sheet metal pieces, a clasp, and 3 or more type of links.
Create your clasp, wire pieces, and cut and pierced pieces. Drill holes into you pierced pieces to add jump rings. Assemble the links together to make your necklace.
Tips
Drilling
- WEAR SAFETY GLASSES
- You will need to drill anywhere you need to add a jump ring and anywhere you are going to have piercing (negative space) in your metal. Carefully consider the placement before drilling.
- Make sure you have at least 1/8" between the drill holes and the edges. REMEMBER THE DRILL HOLE HAS WIDTH.
- Use a hammer and nail to make a starting point for the drill so it goes into the metal smoothly.
- Make sure there is a piece of wood underneath your metal.
- For a drill press, bring the drill down and check the placement before you turn it on. Turn the drill on and create your hole.
Filing
- File until saw marks are no longer visible and you have formed the edges of the shape to follow the curve that you want.
- File in one direction (not back and forth) away from your body
- File off drill burrs so the planes of your piece are smooth
- Doing a thorough job filing will save you time during your sanding
Sanding
- Sandpaper order is 180, 220, 320, 400, 600, 800, 1000
- Sand each grit until you can no longer see visible imperfections. The longer you spend on the lower sandpapers, the faster the sanding will go.
- For 180-600, alternate the direction of your sanding each time you change papers. (Ex. 180 sand top to bottom, 220 sand side to side). Sand until you can no longer see intersecting grains. Starting with 800, sand in the direction you would like the grain to show in the end.
- If an imperfection is not coming out, go back to a sandpaper with a lower number. When you and it out, go back down the sandpapers in order until you get back to where you were. (Don't be afraid to go backwards. IT WILL SAVE YOU TIME! )
- Put a smooth and soft surface (paper towel/ Kleenex/ soft cloth) between your metal and the table to keep it from scratching. Store your metal carefully so you don't scratch it.
