Develop Skills with:
Getting Started
Drying Stages:
Plastic Clay: soft, workable clay
Leatherhard: Clay has dried to it's strongest state. It is moist but stiffer and stronger. This is the best stage to construct slabs
Bone Dry: All the water is out of the clay and it is ready for firing or recycling
Firing Stages:
Greenware: unfired clay
Bisqueware: Clay that has been fired one time and ready to glaze
Glazeware: Clay that has been fired a second time to melt and react the glaze.
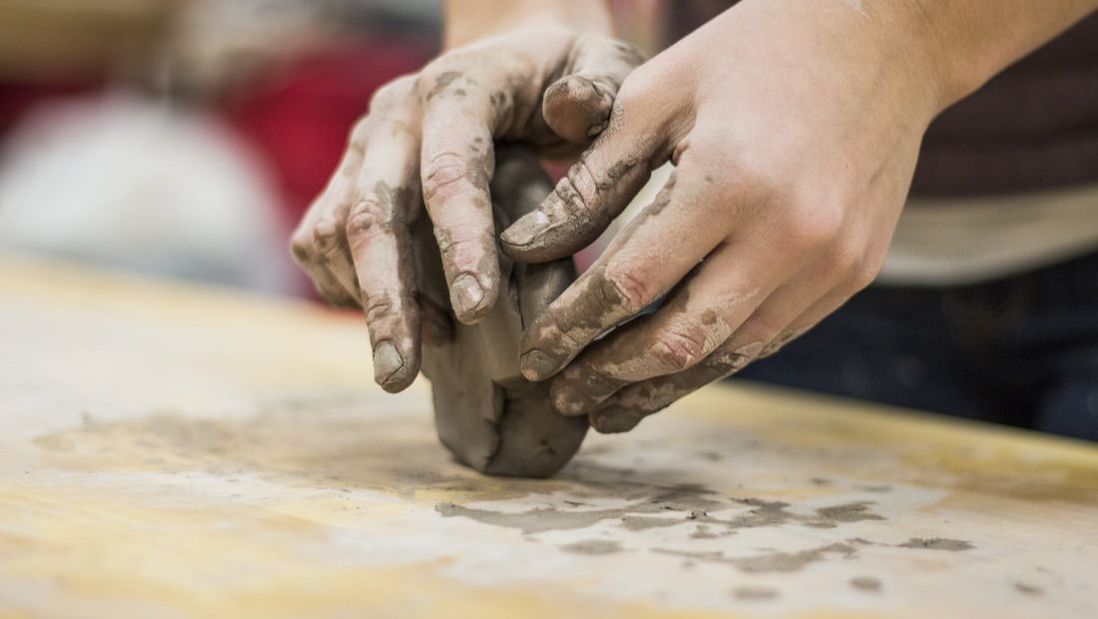
Wedging Clay:
Wedging clay is important because it removes air bubbles and evens out the particles and moisture level in the clay.
You will know you've got it when:
It will be your responsibility to wedge your clay before you begin working. Some artists prefer to wedge their clay each day, while others prefer to wedge up enough clay for their whole project at once and use plastic to keep it the right moisture. Read about and experiment with the 3 methods below and decide which one works best for you. When you have mastered your preferred method, let me know so I can check you off.
You will know you've got it when:
- You slice your clay in half and there are no air bubbles
- Clay is soft and workable but not wet and sloppy
It will be your responsibility to wedge your clay before you begin working. Some artists prefer to wedge their clay each day, while others prefer to wedge up enough clay for their whole project at once and use plastic to keep it the right moisture. Read about and experiment with the 3 methods below and decide which one works best for you. When you have mastered your preferred method, let me know so I can check you off.
Tools and Supplies
Click the images below to learn more!
Experiment
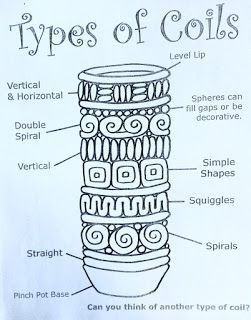
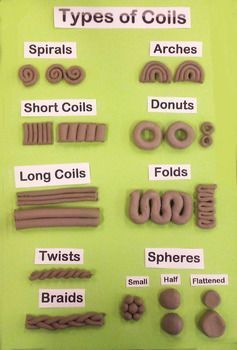
Coil Building
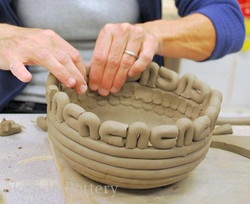
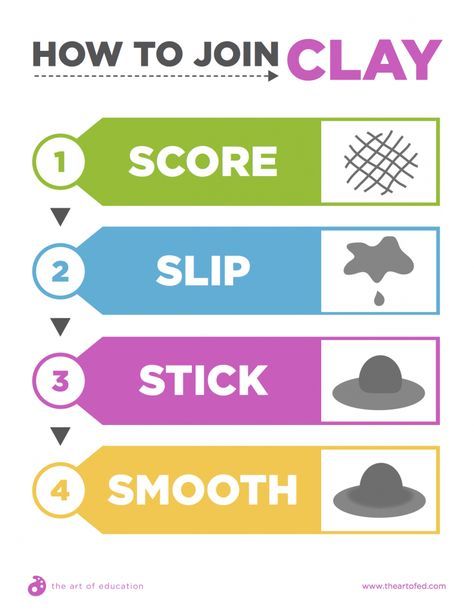
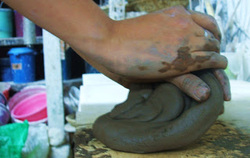
The coil method is used to make rounded forms. The form is started with a slab or pinch pot bottom and each coil is slipped and scored together to create the form. Different coil designs are used to create interest and contrast or in some places the coils are smoothed into a smooth surface. Your bowl should have at least two different types of coils and should be about 3-4" in diameter.
You'll know you've got it when:
You'll know you've got it when:
- Your coils are uniform
- Slip and scored joints are strong
- Curves of the form are smooth and even and the form is symmetrical.
|
|

|
|
|
|
|
Slab Building:
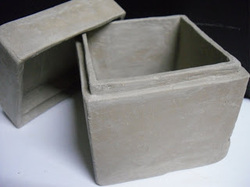
The slab method is used to create geometric forms. You begin by using a rolling pin or slab roller to create a flat, even sheet of clay. Then you cut out pieces and slip and score the pieces together into your form. Your form should be a box with lid, darted cup, or stiff slab vase.
You'll know you've got it when:
You'll know you've got it when:
- Your walls are even thickness and are put together at the right moisture level so there is no warping
- Your joints are strong and smoothed until they are invisible.
- Your lid fits well and walls were clearly cut and measured with a straight edge.
Practice
|
|
|
|
