|
|
Relief Printing is the process of carving a relief block to create an image. The image is then printed on multiple papers to create an edition.
Anatomy of a Linocut Video |
Skills Practice
|
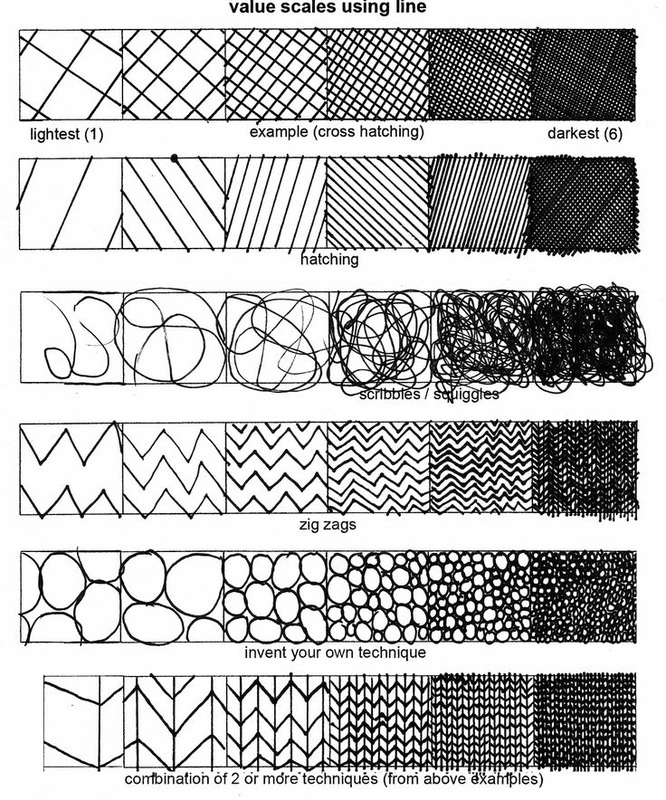
Remember that the style of your carving will effect the look of your print. Value is reverse of drawing--The more marks you make, the LIGHTER the color will be. |
How to:
.
1. Prepare your images for transferring to the block.
1. Email your image to yourself so you can open it on a library computer. Save your image to the desktop.
2. Go to www.pixlr.com
3. Click to open Pixlr Editor
4. Click open image from your computer. Select your picture for your print.
5. Use the crop tool to get the composition that you want. Experiment and pick the view that best creates your mood. Our blocks will be square so if you want your piece to fill the block, crop to a square composition.
6. Go to Adjustments>Hue and Saturation. Turn the saturation all the way down so your image is black and white
7. Go to Adjustments> Posterize. Choose if your image looks better with Level 3 or 4 and hit OK.
8. Save your image as a JPEG to your desktop.
9. Email your photo to Singleton.
2. Transfer your image to your block using this technique
3. Begin carving using your design as a reference.
Remember that your design is just a starting place.
You should remove all of the linoleum in the places you want to be white. You should remove some of the linoleum in the places you want to appear shades of grey. Your line style will really influence the mood of your piece. Places that you want to stay black should be left uncarved.
CARVE OUT LESS THAN YOU THINK YOU WANT! YOU CAN ALWAYS REMOVE MORE BUT YOU CAN'T PUT IT BACK!
4. Test print your block.
Based on your test print, make changes to your piece. Continue testing and carving until you are happy with how your block is printing.
5. Create your registration sheet and cut your papers.
6. Print your final edition.
Remember that your color choice will be a big factor in creating your mood.
